How to enable two-factor authentication (2FA)
Two-factor authentication adds an extra layer of security to your account. After activating, in addition to the password, you will need to enter a temporary code generated by the Google Authenticator application every time you log in.
Step 1 - Access security settings
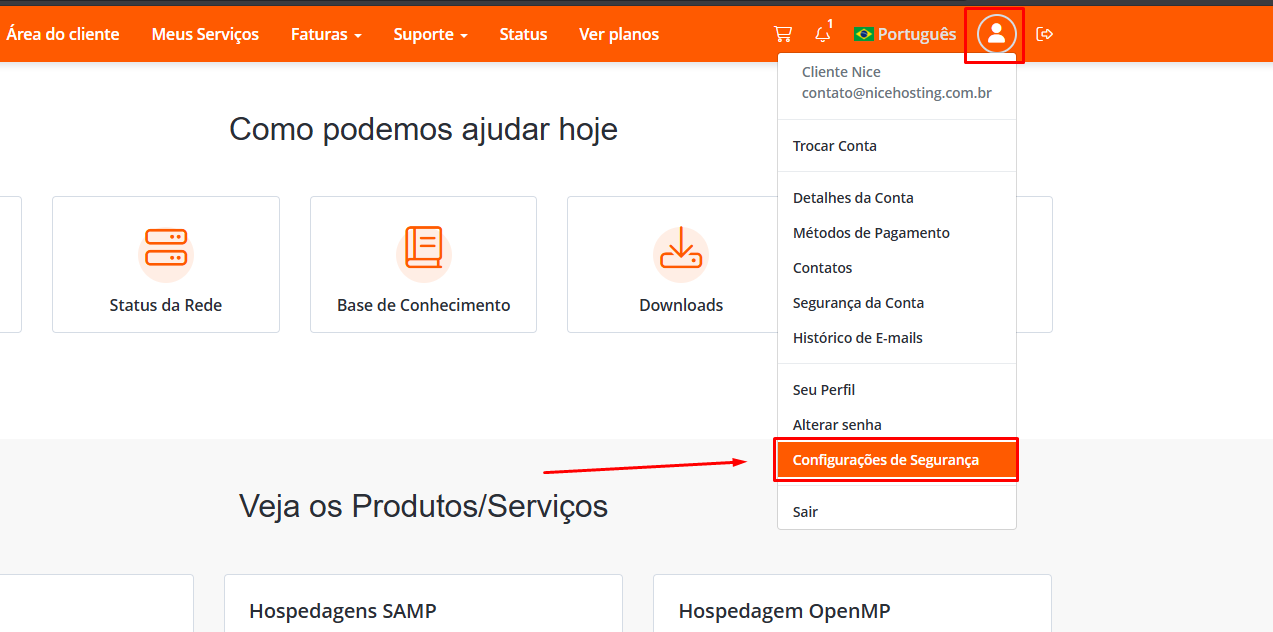
Click the user icon in the upper right corner of the panel and select Security Settings.
Step 2 - Enable two-factor authentication
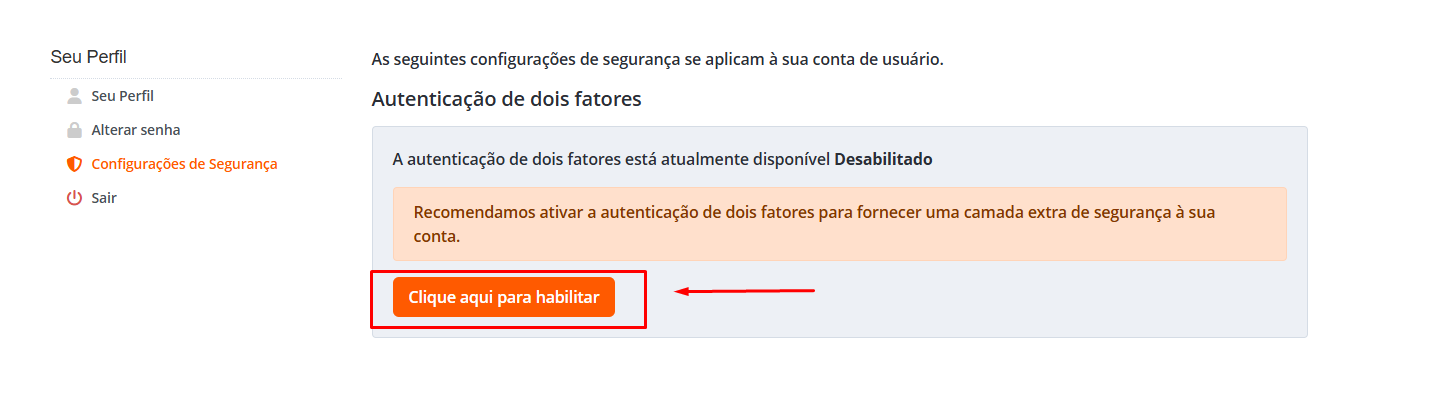
On the account security page, click the Click here to enable button to begin setup.
Step 3 - Choose authentication method
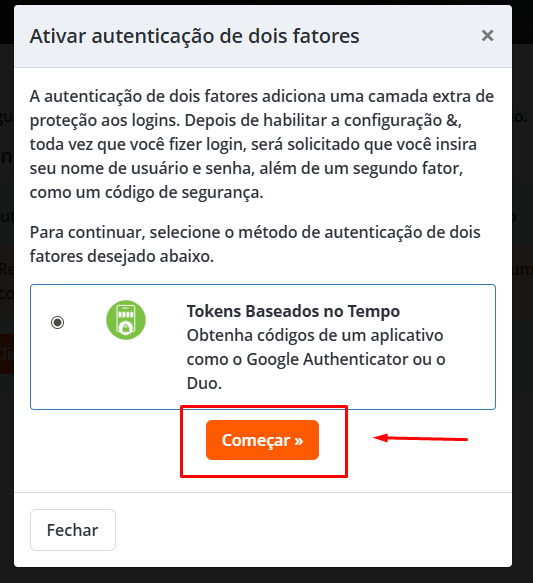
Select the Time-Based Tokens option, which uses authenticator apps like Google Authenticator or Duo.
Then click Start.
Step 4 - Install Google Authenticator on your cell phone
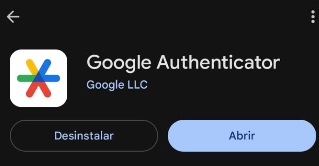
If you don't already have an authenticator app installed on your phone, install Google Authenticator, available for Android and iOS.
Step 5 - Scan the QR Code
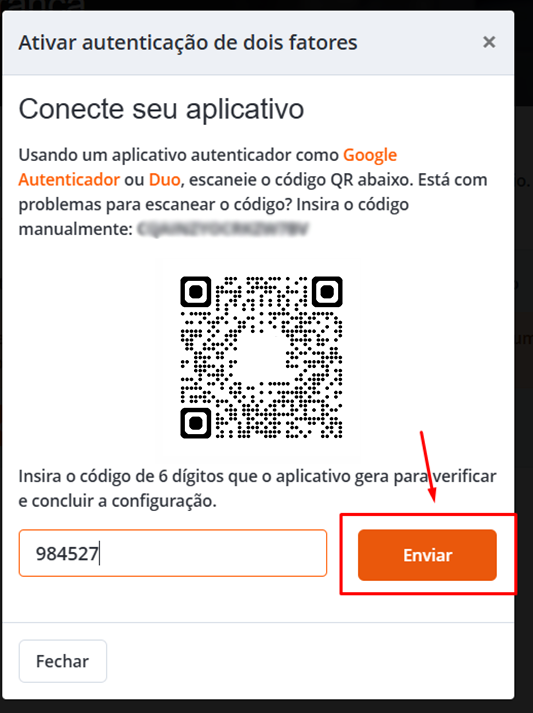
Open the Google Authenticator app and scan the QR Code displayed on the screen.
The app will generate a 6-digit code. Enter this code in the indicated field and click Send to complete the activation.
Step 6 - Save the backup code
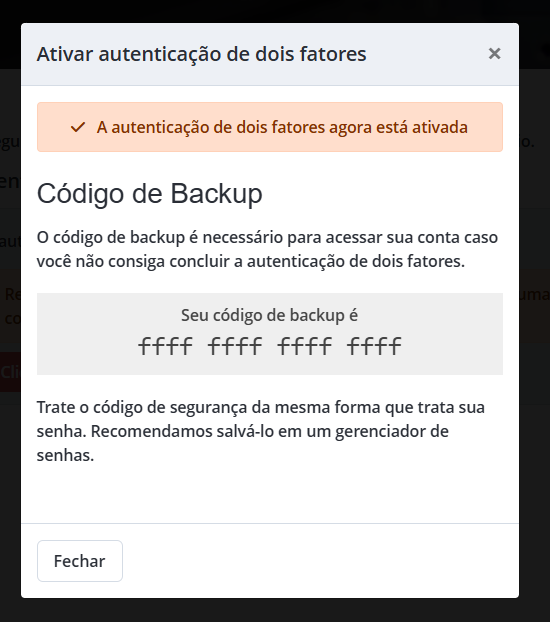
After enabling two-factor authentication, a backup code will be displayed.
This code allows you to access your account if you lose access to the authenticator app. Keep it in a safe place.
After completing these steps, two-factor authentication will be active on your account. Whenever you log in, in addition to your password, you will need to enter the temporary code generated by the authenticator application.
If you still need help, open a ticket with our support.