How to access and manage your Dedicated Server through the Nice Hosting Panel
Managing your dedicated server at Nice Hosting is simple, fast and centralized. Through our control panel, you can view your servers, monitor important information, consult network data, check traffic consumption and perform basic energy actions, such as turning the server on or off.
In this article, we show you in a practical way how to access and use the main functions of the panel.
1. Accessing the control panel
To get started, access the Nice Hosting control panel using your username and password.
On the login screen, you will find the authentication fields and can select the interface language. After filling in your details, click Enter.

2. Viewing your servers
After logging in, you will be directed to the main dashboard area.
In the side menu, access the Servers option or directly view the My Servers section. On this page, all servers linked to your account will be displayed.
Each server appears with basic information, such as:
- Server name;
- Main IP address;
- Current status;
- Button to access details.
To open full management, click View Details.

3. Querying server information
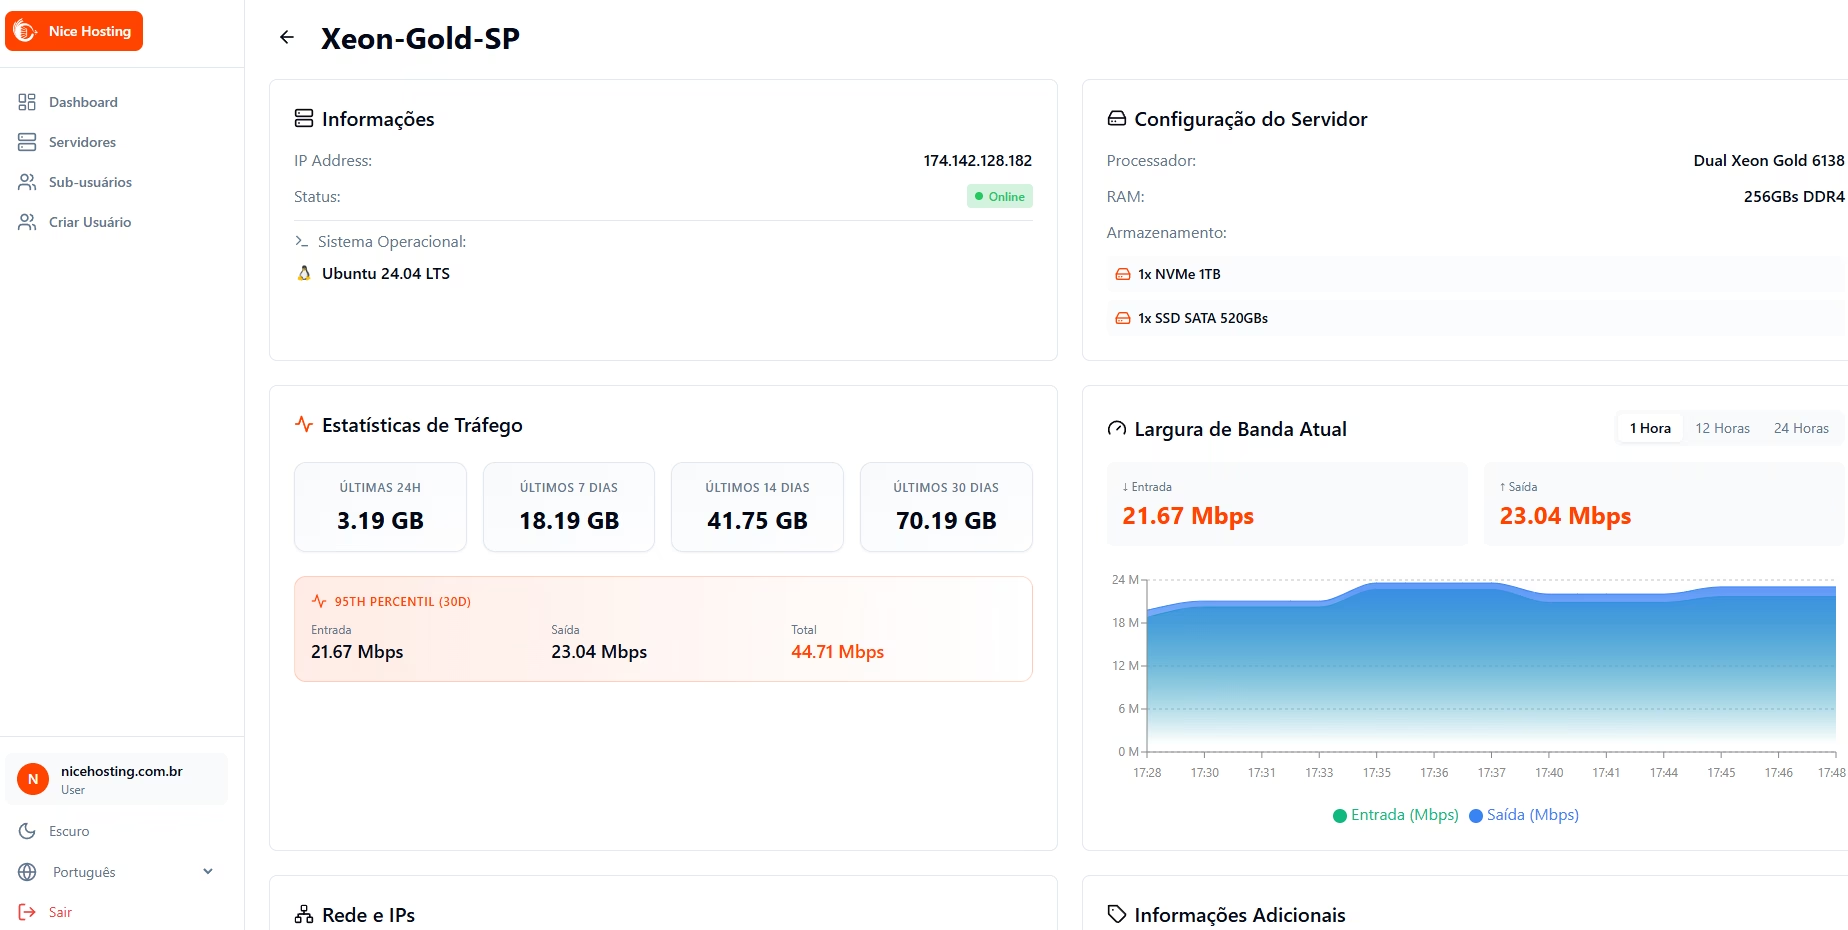
Within the details page, you will be able to view the main information about your dedicated server.
The dashboard displays data such as:
- Main IP;
- Server status;
- Installed operating system;
- Hostname;
- Type of service;
- Processor;
- RAM memory;
- Contracted storage.
This area is useful for quickly confirming server resources and querying important information without having to access the operating system via SSH or another remote method.
4. Tracking traffic and bandwidth
The dashboard also allows you to track server traffic statistics.
In the statistics section, you can view consumption in periods such as:
- Last 24 hours;
- Last 7 days;
- Last 14 days;
- Last 30 days.
Additionally, the Current Bandwidth area displays input and output graphs in Mbps, helping you track network usage in real time or over recent periods.
This feature is useful for identifying usage spikes, tracking server consumption, and getting an overview of connection usage.
5. Querying network information and IPs
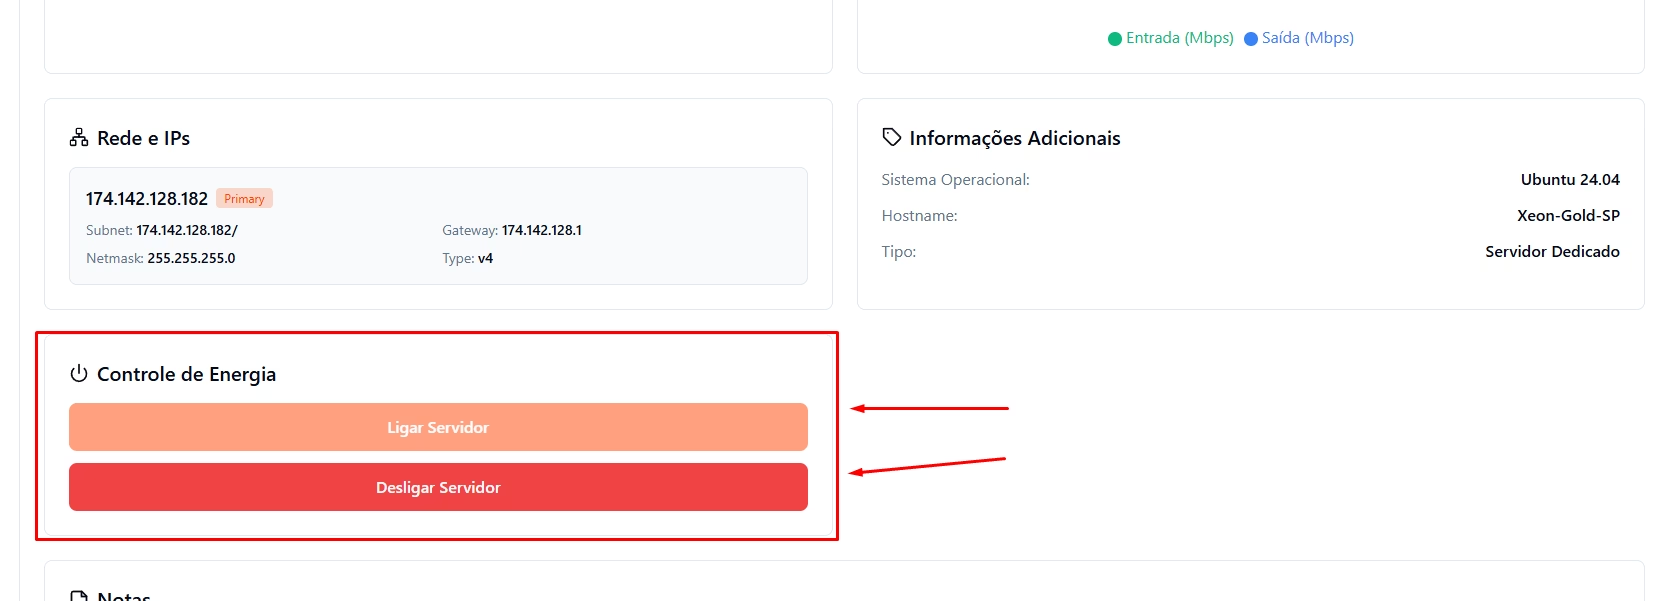
In the Network and IPs section, you will find the network data linked to your server.
Among the information displayed is:
- Main IP;
- Subnet;
- Gateway;
- Netmask;
- IP type.
This information can be used in network configurations, firewall releases, notes, remote access and other technical adjustments.
6. Server Power Control
The panel has a Power Control section, where you can perform basic actions on the server.
Available options include:
- Connect Server
- Shut Down Server
Before shutting down the server, we recommend ensuring that there are no important processes running, updates in progress, or critical services currently being used.
Power control must be used with caution as it may cause temporary unavailability of hosted services.
7. Does the panel replace remote access?
No. The control panel is to facilitate basic management and viewing of server information.
To perform internal configurations, install applications, manage files, configure services or administer the operating system, access must be done via SSH, RDP or another method compatible with the installed system.
The panel works as a complementary management layer, bringing more practicality to monitoring and managing your dedicated server.
If you still need help, open a ticket with our support.